Your condo can look freshly painted without smelling like a renovation site for days. If you are figuring out how to paint condo without smell, the answer is not one magic product. It is a controlled process – choosing the right paint, preparing the space properly, timing the job well, and applying it fast enough that odors never get the chance to linger.
That matters even more in a condo than in a landed home. Windows may be limited, air circulation is often weaker, shared corridors make strong odors a neighbor issue, and many residents are working from home, caring for children, or moving in on a tight schedule. A low-smell paint job is possible, but only when the planning is as good as the painting.
Why condo painting smells worse than expected
Most people blame the paint alone. Sometimes that is true, but often the smell comes from the full system. Primer, patching compound, sealer, cleaning agents, and trapped moisture can all add to the odor. In enclosed condo units, those smells collect quickly.
The other problem is slow execution. If prep stretches over one day, painting takes another, and touch-ups happen again after that, the unit keeps getting reopened to fresh odor sources. A faster, organized workflow usually smells less simply because the whole job is contained and completed sooner.
Step 1: Choose the right paint if you want to paint condo without smell
If your goal is to paint a condo without smell, start with low-VOC or near-zero-VOC interior paint. VOCs, or volatile organic compounds, are one of the main reasons paint odors feel strong and hang in the air. Standard paints can still look good, but they are rarely the best choice for an occupied condo.
That said, low odor does not mean all products perform the same. Some ultra-low-VOC paints are excellent for bedrooms and living areas but may not be ideal for kitchens, bathrooms, or high-traffic walls that need more washability. This is where product selection matters. The right choice depends on the room, the wall condition, and how fast you need the unit ready for use.
A good contractor will explain the paint range clearly instead of pushing one option for every surface. For most condo interiors, a premium low-odor acrylic paint is the safest balance of finish, durability, and occupant comfort.
Step 2: Fix the wall condition first
Fresh paint should not be used to hide bad surfaces. If there are hairline cracks, old flaky paint, damp patches, nicotine stains, or grease buildup, the smell problem gets worse when those areas are painted over too quickly.
Proper prep reduces odor in two ways. First, it prevents repeated coats and unnecessary rework. Second, it avoids sealing in contaminants that can keep releasing unpleasant smells after the paint dries.
This stage usually includes surface cleaning, light sanding where needed, crack patching, and spot sealing. The key is to do only what the wall requires. Over-sanding creates dust. Overusing sealer creates extra odor. Under-prepping causes touch-ups later. The cleanest jobs are the ones done with control, not excess.
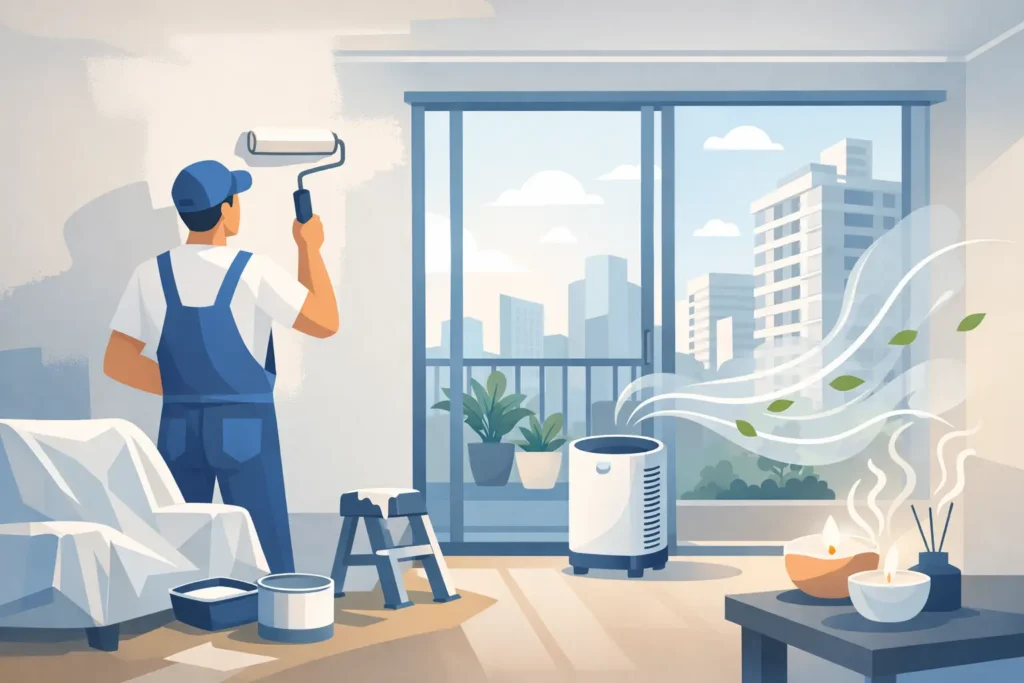
Step 3: Ventilate strategically, not randomly
Many homeowners think opening every window solves everything. Sometimes it helps. Sometimes it actually slows drying if humid air keeps moving in and settling on the walls.
The goal is steady air exchange, not chaotic airflow. Open the windows that create cross ventilation. Keep interior doors positioned so air can move through the painted zones and out of the unit. Use fans to push air outward rather than simply circulating odor from one room to another.
In condos, corridor-facing doors should not be left open for long periods unless management allows it and it will not disturb neighbors. Strong paint smell in common areas can trigger complaints even if the product is technically low odor.
If the unit has air-conditioning, use it carefully. Air-conditioning can help dehumidify the space, which supports drying, but it should not replace fresh air exchange entirely during active painting. The best setup is usually a combination of controlled ventilation and humidity management.
Step 4: Keep the job compact and fast
One of the most practical answers to how to paint condo without smell is simple: reduce the time the unit stays in painting mode.
That means protecting floors and furniture quickly, preparing all wall defects first, and then moving into sealing and multi-coat application in a planned sequence. Room-by-room delays create a stop-start job, and stop-start jobs create lingering smell.
Professional crews usually minimize odor better than piecemeal DIY work because they complete the process in tighter windows. In many condo projects, a disciplined team can assess, prep, paint, clean up, and hand over much faster than a homeowner working over several evenings. Less exposure time often matters just as much as paint chemistry.
Step 5: Use the right sequence for occupied condos
Not every condo needs to be fully vacated during painting. But if people are staying inside the unit, the order of work becomes critical.
Start with the least-used rooms and let those dry first. Bedrooms for children, elderly family members, or anyone sensitive to odors should be scheduled with extra drying time. Common areas can be painted after private rooms are cleared and aired out.
Ceilings usually go first, then walls, then trims and doors if included. This reduces accidental rework and avoids reopening dried areas. The fewer times a painter has to return to fix overlaps, roller marks, or missed patches, the lower the total smell burden in the home.
Step 6: Watch the hidden odor sources
Even when the paint itself is low odor, a few other materials can spoil the whole experience. Solvent-based primers, harsh mold treatments, and aggressive cleaning chemicals can leave a stronger smell than the topcoat.
This is why a low-smell paint job has to be managed as a full system. If a wall stain truly needs a stronger sealer, that may be worth it for long-term performance. But it should be isolated to the smallest possible area, ventilated properly, and not applied across the whole unit by default.
The same applies to wood or metal surfaces. Some specialty coatings smell more than regular wall paint. If you are repainting gates, frames, cabinets, or feature surfaces inside a condo, product selection should be handled separately instead of assuming the same low-odor result across every substrate.
Step 7: Protect soft furnishings and fabrics
Curtains, rugs, bedding, and upholstered furniture absorb odor faster than most people realize. If these stay exposed during painting, the room can smell painted long after the walls are dry.
Soft items should be removed where possible or sealed properly before work starts. This does not just protect them from splatter. It also prevents them from acting like odor sponges.
A clean handover matters here. Once painting is done, coverings should be removed promptly, debris cleared, and the space wiped down. Leaving used masking, dusty sheets, or damp patching residue inside the condo defeats the purpose of using low-odor materials in the first place.
Step 8: Respect drying time, even when the paint feels dry
A wall can feel touch-dry and still be releasing mild odor while it cures. That does not mean something went wrong. It means the final stage is still happening.
This is where realistic planning helps. If you need the condo ready for move-in, schedule painting early enough that rooms can air out before furniture arrives. If you are painting before tenants move in, do not book the work so late that everyone is forced to live with fresh paint immediately.
Fast completion is useful, but speed should not come at the expense of cure time. The best results come from balancing both – efficient application followed by sensible airing out.
When DIY works and when it usually does not
A single bedroom touch-up with the right paint and good ventilation can be manageable as a DIY task. Full condo repainting is different. The more rooms involved, the more likely it is that odor control depends on logistics, manpower, and sequencing rather than effort alone.
This is where a done-for-you contractor has a real advantage. A trained in-house team can assess wall conditions, recommend suitable low-odor products, complete the prep correctly, and finish the job on a defined timeline without dragging disruption across multiple days. That is often the difference between a condo that smells fresh and one that smells painted.
For homeowners who want predictable execution, this is not just about convenience. It is about avoiding rework, neighbor complaints, and the familiar problem of a project that starts small and takes over the week. Brands such as Painting.com.sg position the service around exactly that kind of controlled, fast-turnaround workflow because in condos, process is what keeps the job clean.
A practical standard for odor-free condo painting
If you remember one thing, make it this: low-smell condo painting is not a paint purchase, it is a process decision. The best outcome comes from matching low-odor products to the right surfaces, preparing walls properly, controlling airflow, and completing the work in a tight, organized window.
A condo does not give you much room for error. But with the right workflow, you can repaint the space, protect your routine, and walk back into a home that feels refreshed instead of overwhelmed.