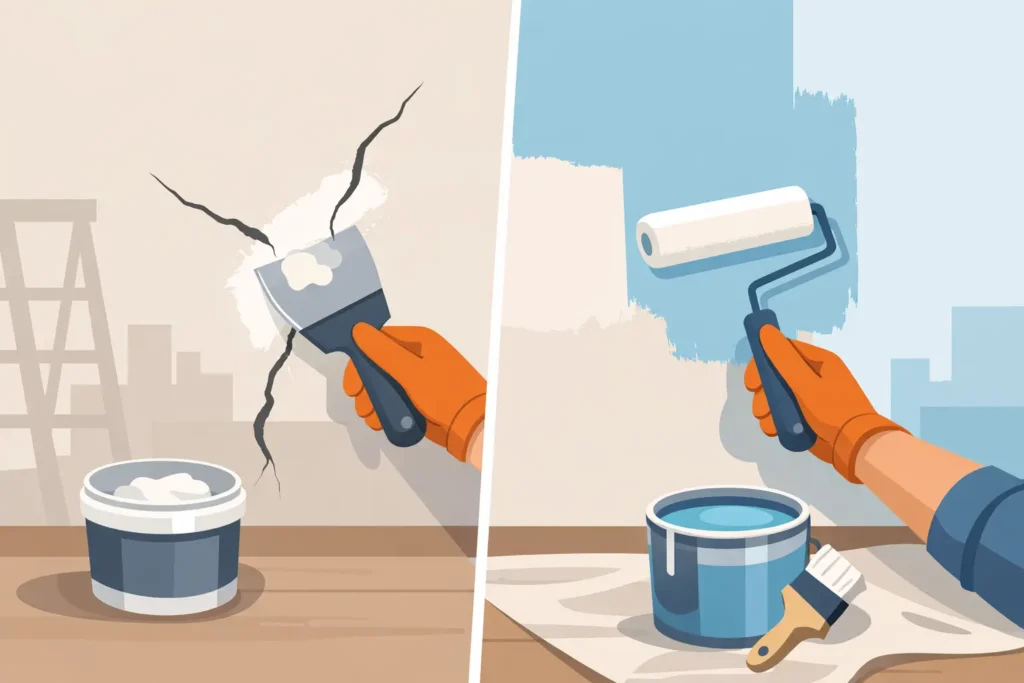
Fresh paint makes cracks look worse, not better.
That hairline line above the door, the split near a window frame, the flaky patched spot in the living room – once a new coat goes on, every weak area tends to show through. That is why wall crack patching before painting is not an optional extra. It is part of the paint job itself if you want a clean finish that lasts.
For homeowners and property managers, the real issue is not just appearance. It is time, disruption, and repeat work. If cracks are patched poorly, you end up repainting sooner, calling someone back, or living with visible lines on a wall that was supposed to look new.
Why wall crack patching before painting matters
Paint is a finish coat. It is not a structural repair product, and it does not hide movement, loose substrate, or poor preparation. If a crack is still active, or if the surrounding plaster is chalky and weak, paint will simply bridge over the problem for a short time and then fail.
In practical terms, that failure shows up as ghost lines, bubbling, edge lifting, and uneven texture. On white or light-colored walls, even a fine repaired crack can cast a slight shadow if the patch is not feathered properly. In rooms with side lighting, the defect becomes even more obvious.
This is why professional prep takes longer than many owners expect. The visible crack is only one part of the job. The surrounding area has to be checked for adhesion, moisture, hollow plaster, and previous failed fillers. A fast paint job without proper patching may look acceptable for handover day, but it often does not stay that way.
Not every wall crack means the same thing
Some cracks are cosmetic. Others point to movement, moisture, or substrate failure. Knowing the difference affects how the patch should be done and whether painting should proceed immediately.
Hairline plaster cracks are common around corners, door frames, beam joints, and older skim-coated walls. These are often caused by settling, shrinkage, or minor movement. They can usually be opened slightly, cleaned, filled, sanded, sealed, and painted successfully.
Wider cracks need more attention. If the crack keeps reopening, runs diagonally from corners, or comes with staining or dampness, filler alone is not enough. The root cause needs to be addressed first. In some cases that means moisture control. In others, it may mean removing loose material back to a sound surface and rebuilding the area more thoroughly.
That is the trade-off many owners miss. Quick patching saves time today, but if the crack is linked to water ingress or ongoing movement, repainting over it is only delaying the real repair.
The right process for wall crack patching before painting
Good results come from a systematic process, not guesswork. This is especially important when the goal is a fast, clean repaint with minimal disruption.
1. Inspect the crack, not just the line
A proper check looks at width, depth, length, location, and surrounding surface condition. Contractors should press around the area to see if the plaster is loose or powdery. They should also check for past patch jobs that have failed, because patching over old weak filler usually leads to another failure.
If there are water marks, peeling paint, mold spots, or a soft wall surface, the job changes immediately. Painting should not start until the damp source is understood.
2. Remove weak material
This is the step that separates a durable repair from a cosmetic cover-up. The crack is usually opened slightly so the filler can bond properly instead of sitting only on the surface. Loose paint, dust, chalky skim coat, and brittle filler must be removed.
Many patch failures happen because the repair was applied onto a dirty or unstable surface. It looks filled on day one, then shrinks, cracks, or detaches after the room dries out or the wall heats up.
3. Apply the correct filler or patching compound
There is no single filler for every crack. Fine surface cracks may only need a quality patching compound. Slightly wider or recurring cracks may need a more flexible system, sometimes with reinforcing mesh or tape depending on the substrate and movement risk.
This is where experience matters. Overfilling can create a hump. Underfilling leaves a visible depression. The patch has to be built to match the wall plane, then allowed to cure properly before sanding.
4. Sand and feather the area
A patched wall should not have a visible island around the repair. The edges need to be feathered smoothly into the existing surface so the final paint finish looks even from different viewing angles.
This step is often rushed in occupied homes because people want the job done fast. But speed without control creates telegraphing, where the repair line shows through even after two coats of paint.
5. Seal before painting
Patches absorb paint differently from old painted surfaces. If the repaired area is not sealed or primed correctly, flashing can occur. That means the patch reflects light differently and becomes visible even when the color matches.
A sealer or suitable primer helps even out porosity and gives the topcoats a more consistent finish. On walls with multiple patch areas, this step matters even more.
When a DIY patch is enough and when it is not
A small hairline crack in a low-risk area can be handled by a careful DIY owner. If the wall is dry, stable, and the crack is clearly cosmetic, patching may be straightforward.
But larger repainting projects are different. If you are painting an entire apartment, preparing for move-in, handing over a rental unit, or refreshing a commercial space on a tight schedule, patching needs to be consistent across every room. One uneven repair can stand out on an otherwise freshly painted wall.
The other issue is time. Crack patching creates dust, requires drying intervals, and depends on surface judgment. If you are coordinating furniture shifting, cleaning, or a move date, this is usually where delays start. A done-for-you painting team can sequence protection, patching, sealing, painting, touch-ups, and cleanup as one controlled workflow instead of separate tasks.
What property owners should expect from a professional painting team
If crack patching is included as part of painting works, ask how it is handled. The right contractor should be able to explain the prep steps clearly, identify whether cracks are cosmetic or risk-related, and tell you when additional repair may be needed.
You should also expect practical transparency. That means clear scope, realistic timeline, and no vague promise that paint alone will make wall defects disappear. Some cracks can be repaired neatly. Some may reduce in visibility but still carry movement risk. Honest assessment matters more than saying yes to everything.
For occupied homes and offices, process control matters just as much as technical skill. Floors, furniture, and fixtures should be protected. Dust should be managed. Drying and repainting stages should be planned so the space gets back to normal quickly.
That is why many owners prefer a single contractor that handles patching and painting together. It removes the handoff problem between a handyman, a painter, and a separate cleaner. At https://Www.painting.com.sg, that full workflow is exactly how projects are executed – from assessment and surface preparation through painting, touch-ups, and handover.
Common mistakes that make cracks show again
The most common mistake is painting directly over a crack and hoping the finish coat hides it. It usually does the opposite.
The next mistake is using the wrong material. A filler that is too rigid, too weak, or applied too thick can fail quickly. Another common issue is skipping sealer on patched spots, which leads to visible flashing after painting.
Then there is the timing problem. If the patch has not dried or cured properly, sanding becomes messy, paint adhesion drops, and the repair may shrink later. Fast turnaround is valuable, but only when the workflow is built to support it.
A better repaint starts before the first coat
When clients say they want walls to look clean, smooth, and new, they are usually talking about the finish. But the finish depends on what happens underneath. Crack patching is where the quality of the final result is decided.
If you are planning to repaint, treat wall prep as part of the investment, not an add-on. A properly patched wall looks better on day one, stays presentable longer, and saves you from paying twice for the same problem.
The best paint job is not the one that starts fastest. It is the one that starts with the right repair, so once the paint goes on, you can stop thinking about the wall and get on with everything else.